Run ACCESS-CM2
Danger
ACCESS-NRI does not maintain an official ACCESS-CM2 release, but we continue to support the community in using this model where possible.
Warning
Important for accessdev users!
If you were an accessdev user, make sure you are a member of hr22 and ki32 projects.
Then, refer to instructions on how to Set up persistent session workflow for ACCESS-CM2, and how to port suites from accessdev.
About
The ACCESS Coupled Model (ACCESS-CM) is a fully-coupled global climate model that includes atmosphere, aerosols and atmospheric chemistry, land, ocean and sea ice components, linked together by a coupler.
It produces physical climate simulations.
A full description of the model and its components is available in the ACCESS-CM2 overview.
ACCESS-CM2 runs using the Rose/Cylc workflow management tool on the Gadi supercomputer. Follow the steps below to set up and run the model.
Prerequisites
-
NCI account
Before running an ACCESS model, you need to Set Up your NCI Account. -
MOSRS account
MOSRS is a server run by the UKMO to support collaborative development with other partners organisations. MOSRS contains the source code for some ACCESS model components and configurations, and a MOSRS account is a license requirement to run some ACCESS configurations.
To apply for a MOSRS account, please contact your local institutional sponsor.Warning
The waiting time to obtain a MOSRS account can be up to 3 weeks.
-
Join NCI projects
Join the following projects by requesting membership on their respective NCI project pages:Tip
To request membership for the ki32_mosrs subproject, you need to:
- already be member of the ki32 project
- have a MOSRS account
For more information on joining specific NCI projects, refer to How to connect to a project.
Connecting to Gadi
You can run Rose/Cylc either from a Gadi login node or via an ARE VDI session.
Connect via Gadi login node
Follow the steps to login to Gadi, making sure to enable X11 forwarding, for example by adding the -X option to the ssh command. This allows the Rose and Cylc GUIs to be launched on your local machine.
Once you are connected, skip directly to Set up a persistent session.
Launch ARE VDI Desktop
If you are not familiar with ARE, check out the Getting Started on ARE section.
Tip
The ARE VDI session does not run model tasks directly; it only runs Rose/Cylc. The model tasks are dispatched by Cylc to the compute nodes. This means the ARE VDI session requires minimal CPU and memory resources.
Go to the ARE VDI page and launch a session with the following entries:
-
Walltime (hours) →
2
Amount of hours the ARE VDI session will remain active for. This is only setup time, and does not reflect how long the actual configuration will take to run.Tip
Some model configurations might require a longer setup time. The Walltime included here should be sufficient for most model configurations, but if your ARE session terminates before the model setup is complete, you can start a new ARE VDI session.
-
Queue →
normalbw -
Compute Size →
tiny(1 CPU) -
Project → a project of which you are a member.
The project must have allocated SU. By default, this will be set to your default project$PROJECT. -
Storage →
gdata/access+gdata/xp65+gdata/hr22+gdata/ki32(minimum)
This is a list of all project data storage, joined by plus (+) signs, needed for the ACCESS-CM2 simulation. In ARE, storage locations need to be explicitly defined to access data from within a VDI instance.
Every ACCESS-CM2 simulation can be unique and input data can originate from various sources. Hence, if your simulation requires data stored in project folders other thanaccess,xp65,hr22orki32, you need to add those projects to the storage path.
For example, if your ACCESS-CM2 simulation requires data stored in/g/data/tm70and/scratch/w40, your full storage path will be:gdata/access+gdata/xp65+gdata/hr22+gdata/ki32+gdata/tm70+scratch/w40
Launch the ARE session and, once it starts, click on Launch VDI Desktop.
Warning
This example is provided for reference only. Please use the resource specifications listed above when starting the ARE VDI session.
Once the new tab opens, you will see a Desktop with a few folders on the left. Click the terminal icon at the top of the window to open a terminal. You should now be connected to a Gadi computing node. Use this terminal for all subsequent steps in this guide.

Set up ACCESS-CM2 persistent session
NCI provides a service called persistent sessions to enable long running processes, like Cylc, to stay active even when the user disconnects from Gadi.
You will need to start a persistent session in order to run ACCESS-CM2.
It is recommended to have only one active persistent session at any given time, as multiple Cylc sessions can use the same persistent session.
Note that persistent sessions are terminated during the quarterly maintenance at NCI and will need to be restarted afterwards. The new persistent session can be given the same name as used previously.
Start a new persistent session
Start a new persistent session by running:
persistent-sessions start -p <project> <name>
where <project> is the project you want to start the session under, and <name> is the name you want to give your persistent session.
Warning
Persistent session names accept only a limited set of characters. We recommend using only alpha-numeric characters without spaces or underscores.
The label of a newly-created persistent session has the following format:
<name>.<$USER>.<project>.ps.gadi.nci.org.au.
Tip
If -p <project> is omitted, your default project $PROJECT will be used.
Tip
The project assigned to a persistent session does not have to be the same one used to run the ACCESS model configuration. In addition, the same persistent session can be used to run multiple simulations simultaneously.
The newly created persistent session is assigned a unique identifier, referred to here as <persistent-session-uuid>.
Assign the persistent session to Cylc (once only)
Once the session is running, it needs to be assigned to Cylc. This is done by inserting the persistent session label into ~/.persistent-sessions/cylc-session, which can be done with the following command (substituting <name> and <project> with the name and project used to create the persistent session).
cat > ~/.persistent-sessions/cylc-session <<< "<name>.${USER}.<project>.ps.gadi.nci.org.au"
You can check that this worked with:
cat ~/.persistent-sessions/cylc-session
For example, if user abc123 started a persistent session named ForCylc under the project tm70, then the command would be:
For more information on how to specify the target session, refer to Specify Target Session with Cylc7 Suites.
List active persistent sessions
To list your currently active sessions, use:
persistent-sessions list
Terminate a persistent session
To end a specific session, use:
persistent-sessions kill <persistent-session-uuid>
Tip
Logging out of a Gadi login node or an ARE VDI terminal instance will not affect your persistent session.
Warning
When you terminate a persistent session, any model running on that session will stop. Therefore, you should check whether you have any active model runs before terminating a persistent session.
Set up Rose/Cylc
To run ACCESS-CM2, you will use the Rose/Cylc workflow management tool, which consists of two components:
- The Cylc (pronounced ‘silk’) task engine, developed by the New Zealand National Institute of Water and Atmospheric Research - NIWA (now Earth Sciences NZ). Cylc is a workflow manager that automatically executes tasks according to the model's configuration. Cylc controls how the job will be run and manages the time steps of each model component. It also monitors all tasks, reporting any errors that may occur.
- The Rose framework, developed by the UKMO which configures tasks for the Cylc engine. Rose is a toolkit that can be used to view, edit and run some of the ACCESS models.
A set of tasks configured by Rose to run with the Cylc7 engine is called a suite. Every suite has a unique identifier called suite-ID in the form u-LLNNN, where L is a letter and N is a number (e.g., u-ab123).
Rose and Cylc executables
Make the rose and cylc executables available by loading the Cylc module:
module use /g/data/hr22/modulefiles
module load cylc7
Warning
Cylc version >= cylc7/24.03 required.
MOSRS authentication
The ACCESS models which use Cylc require a connection to the MOSRS mirror on Gadi. To connect to this mirror, you must first authenticate your MOSRS credentials with:
mosrs-auth
This will request the username and password you received when you created your MOSRS account.
After the first authentication, you will need to run mosrs-auth every 24 hours and for every new connection to Gadi (e.g., new terminal) to verify your password against the saved credentials.
Get ACCESS-CM2 suite
ACCESS-CM2 comprises the model components UM, MOM, CICE and CABLE, coupled through OASIS. These components, which have different model parameters, input data and computer-related information, need to be packaged together as a suite in order to run.
Each ACCESS-CM2 suite has a suite-ID in the format u-<suite-name>, where <suite-name> is a unique identifier.
For this example you can use u-cy339, which is a pre-industrial experiment suite.
Typically, an existing suite is copied using Rosie and then edited as needed for a particular run. Rosie is an SVN repository wrapper with a set of options specific for ACCESS modelling suites. It is automatically available within the Rose setup.
ACCESS-CM2 configuration can be copied from the MOSRS repository in 2 ways:
Suites are, by default, created in the user's Gadi home directory under ~/roses/<suite-ID>.
This path will be referred to as the suite directory.
The suite directory contains multiple subdirectories and files, including:
app→ directory containing the configuration files for various tasks within the suite.meta→ directory containing the GUI metadata.rose-suite.conf→ main suite configuration file.rose-suite.info→ suite information file.suite.rc→ Cylc control script file (Jinja2 language).
Local-only copy
To create a local copy of ACCESS-CM2 suite from MOSRS repository, run:
rosie checkout u-cy339
Remote and local copy
To create a new copy of ACCESS-CM2 suite both locally and remotely in the MOSRS repository, run:
rosie copy u-cy339
<suite-ID> folder is generated within the MOSRS repository and populated with descriptive information about the suite and its initial configuration.
For additional rosie options, run:
rosie help
Edit ACCESS-CM2 suite configuration
This section describes how to modify the ACCESS-CM2 configuration.
The modifications discussed in this section can change the way ACCESS-CM2 is run, or how specific model components are configured and coupled together.
In general, ACCESS modelling suites can be edited either by directly modifying the configuration files within the suite directory, or by using the Rose GUI.
Warning
Unless you are an experienced user, directly modifying configuration files is usually discouraged to avoid encountering errors.
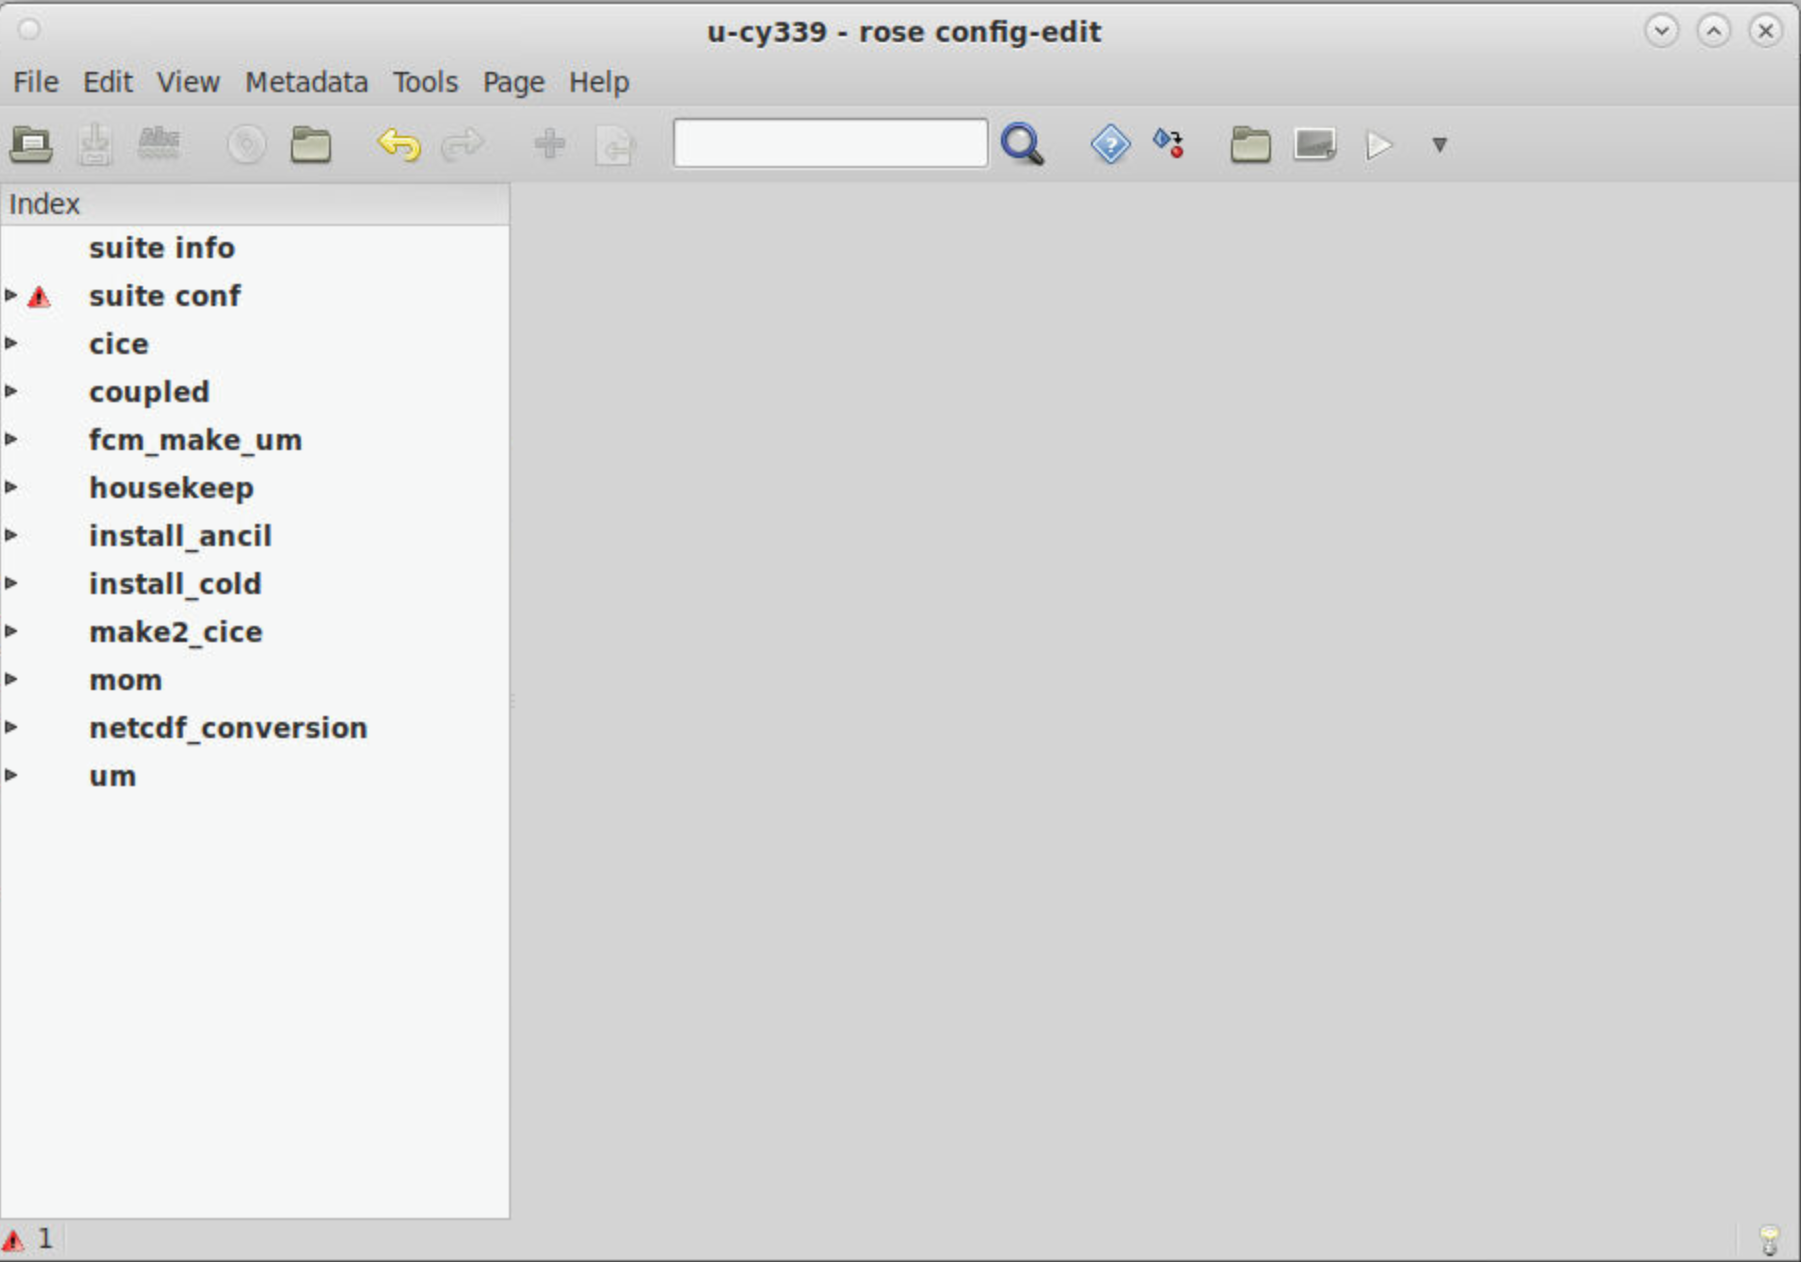
Rose GUI
To open the Rose GUI, run the following command from within the suite directory:
rose edit &
Tip
The & is optional. It allows the terminal prompt to remain active while running the Rose GUI as a separate process in the background.
Change NCI project
To ensure that your suite is run under the correct NCI project for which you are a member, edit the Compute project field in suite conf → Machine and Runtime Options, and click the Save button  .
.
For example, to run an ACCESS-CM2 suite under the tm70 project (ACCESS-NRI), enter tm70 in the Compute project field:
Warning
To run ACCESS-CM2, you need to be a member of a project with allocated SU. For more information, check how to Join relevant NCI projects.
Change run length and cycling frequency
Warning
Note there is a known issue related to changing the cycling frequency. ACCESS-CM2 does not give identical results with different cycling frequencies. For example, one cycle of 12 months will not produce identical output to 12 cycles of one month. When comparing multiple experiments, they should use the same cycling frequency.
ACCESS-CM2 suites are often run in multiple steps, each one constituting a cycle. The job scheduler resubmits the suite every chosen Cycling frequency until the Total Run length is reached.
To modify these parameters, navigate to suite conf → Run Initialisation and Cycling, edit the respective fields (using ISO 8601 Duration format) and click the Save button .
For example, to run a suite for a total of 50 years with a 1-year job resubmission, change Total Run length to P50Y and Cycling frequency to P1Y (the maximum Cycling frequency is currently two years):
Change wallclock time
The Wallclock time is the time requested by the PBS job to run a single cycle. If this time is insufficient for the suite to complete a cycle, your job will be terminated before completing the run. Hence, if you change the Cycling frequency, you may also need to change the Wallclock time accordingly. While the time required for a suite to complete a cycle depends on several factors, a good estimation is 4 hours per simulated year.
To modify the Wallclock time, edit the respective field in suite conf → Run Initialisation and Cycling (using ISO 8601 Duration format) and click the Save button .
Change warm restart date
This ACCESS-CM2 configuration uses initial conditions from a previous ACCESS-CM2 simulation, a process known as warm restart.
The specific date of the initial conditions is set using the Warm restart date parameter, formatted as YYYYMMDD.
To modify the Warm restart date, edit the respective field in suite conf → Run Initialisation and Cycling and click the Save button .
Run ACCESS-CM2 suite
ACCESS-CM2 suites run on Gadi through a PBS job submission.
When the suite runs, its configuration files are copied on Gadi inside /scratch/$PROJECT/$USER/cylc-run/<suite-ID> and a symbolic link to this directory is also created in the $USER's home directory under ~/cylc-run/<suite-ID>.
An ACCESS-CM2 suite comprises several tasks, such as checking out code repositories, compiling and building the different model components, running the model, etc. The workflow of these tasks is controlled by Cylc.
Cylc
Cylc (pronounced ‘silk’) is a workflow manager that automatically executes tasks according to the model's main cycle script suite.rc. Cylc controls how the job will be run and manages the time steps of each submodel. It also monitors all tasks, reporting any errors that may occur.
To run an ACCESS-CM2 suite run the following command from within the suite directory:
rose suite-run
After the initial tasks are executed, the Cylc GUI will open. You can now view and control the different tasks in the suite as they are run:
cylc warranty. It is free software, you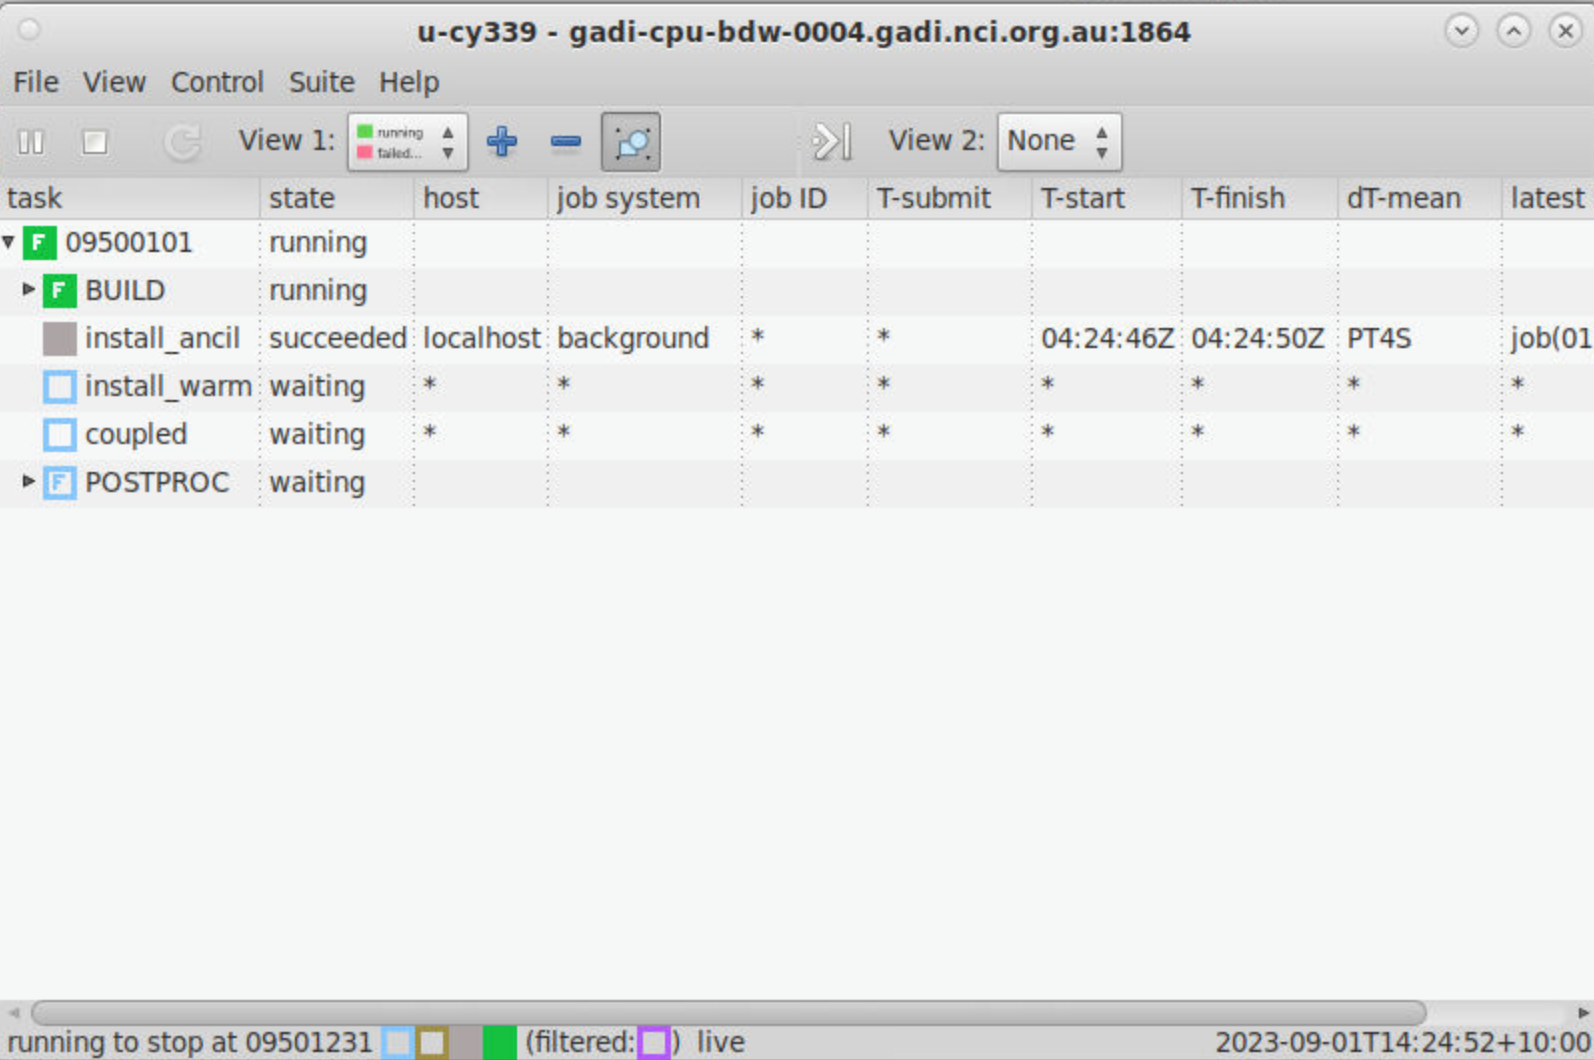 -->
-->
Warning
After running the command rose suite-run, if you get an error similar to the following:
[FAIL] Suite "<suite-ID>" appears to be running:
[FAIL] Contact info from: "/home/565/<$USER>/cylc-run/<suite-ID>/.service/contact"
[FAIL]    CYLC_SUITE_HOST=<persistent-session-full-name>
[FAIL]    CYLC_SUITE_OWNER=<$USER>
[FAIL]    CYLC_SUITE_PORT=<port>
[FAIL]    CYLC_SUITE_PROCESS=<PID> /g/data/hr22/apps/cylc7/bin/python -s /g/data/hr22/apps/cylc7/cylc_7.9.7/bin/cylc-run <suite-ID> --host=localhost
[FAIL] Try "cylc stop '<suite-ID>'" first?<suite-ID> with the suite-ID):
rm "/home/565/${USER}/cylc-run/<suite-ID>/.service/contact"
rose suite-run command again.
You are done!
If you do not get any errors, you can check the suite output files after the run is complete.
You can now close the Cylc GUI. To open it again, run the following command from within the suite directory:
rose suite-gcontrol
Monitor ACCESS-CM2 runs
Check for errors
It is quite common, especially during the first few runs, to experience errors and job failures. Running an ACCESS-CM2 suite involves the execution of several tasks, and any of these tasks could fail. When a task fails, the suite is halted and a red icon appears next to the respective task name in the Cylc GUI.
To investigate the cause of a failure, we need to look at the logs job.err and job.out from the suite run. There are two main ways to do so:
Using the Cylc GUI
Right-click on the task that failed and click on View Job Logs (Viewer) → job.err (or job.out).
To access a specific task, click on the arrow next to the task to extend the drop-down menu with all the subtasks.
Through the suite directory
The suite's log directories are stored in ~/cylc-run/<suite-ID> as log.<TIMESTAMP>, and the latest set of logs are also symlinked in the ~/cylc-run/<suite-ID>/log directory.
The logs for the main job can be found in the ~/cylc-run/<suite-ID>/log/job directory.
Logs are separated into simulation cycles according to their starting dates, then divided into subdirectories according to the task name. They are then further separated into "attempts" (consecutive failed/successful tasks), where NN is a symlink to the most recent attempt.
In the example above, a failure occurred for the 09500101 simulation cycle (i.e. starting date: 1st January 950) in the coupled task. Hence, the job.err and job.out files can be found in the ~/cylc-run/<suite-ID>/log/job/09500101/coupled/NN directory.
Model Live Diagnostics
ACCESS-NRI developed the Model Live Diagnostics framework to check, monitor, visualise, and evaluate model behaviour and progress of ACCESS models currently running on Gadi.
For a complete documentation on how to use this framework, check the Model Live Diagnostics documentation.
Stop, restart and reload suites
In some cases, you may want to control the running state of a suite.
If your Cylc GUI has been closed and you are unsure whether your suite is still running, you can scan for active suites and reopen the GUI if desired.
To scan for active suites, run:
cylc scan
rose suite-gcontrol
STOP a suite
To shutdown a suite in a safe manner, run the following command from within the suite directory:
rose suite-stop -y
-
Check the status of all your PBS jobs:
qstat -u $USER -
Delete any job related to your run:
qdel <job-ID>
RESTART a suite
There are two main ways to restart a suite:
SOFT restart
To reinstall the suite and reopen Cylc in the same state it was prior to being stopped, run the following command from within the suite directory:
rose suite-run --restart
Warning
You may need to manually trigger failed tasks from the Cylc GUI.
HARD restart
To overwrite any previous runs of the suite and start afresh, run the following command from within the suite directory:
rose suite-run --new
Warning
This will overwrite all existing model output and logs for the same suite.
RELOAD a suite
In some cases the suite needs to be updated without necessarily having to stop it (e.g., after fixing a typo in a file). Updating an active suite is called a reload, where the suite is re-installed and Cylc is updated with the changes. This is similar to a SOFT restart, except new changes are installed, so you may need to manually trigger failed tasks from the Cylc GUI.
To reload a suite, run the following command from within the suite directory:
rose suite-run --reload
ACCESS-CM2 output files
All ACCESS-CM2 output files, together with work files, are available on Gadi inside /scratch/$PROJECT/$USER/cylc-run/<suite-ID>. They are also symlinked in ~/cylc-run/<suite-ID>.
While the suite is running, files are moved between the share and work directories.
At the end of each cycle, model output data and restart files are moved to /scratch/$PROJECT/$USER/archive/<suite-name>.
This directory contains two subdirectories:
historyrestart
Output data
/scratch/$PROJECT/$USER/archive/<suite-name>/history is the directory containing the model output data, which is grouped according to each model component:
For the atmospheric output data, the files are typically a UM fieldsfile or netCDF file, formatted as <suite-name>a.p<output-stream-identifier><year><month-string>.
For the u-cy339 suite in this example, the atm directory contains:
Restart files
The restart files can be found in the /scratch/$PROJECT/$USER/archive/<suite-name>/restart directory, where they are categorised according to model components (similar to the history folder above).
The atmospheric restart files, which are UM fieldsfiles, are formatted as <suite-name>a.da<year><month><day>_00.
For the u-cy339 suite in this example, the atm directory contains:
Files formatted as <suite-name>a.xhist-<year><month><day> contain metadata information.
Troubleshooting
Update suites still relying on hh5
Warning
Some suites might still not work when ported this way.
If you have a suite that was relying on hh5 and, even after following the steps below, the run submission fails, consider getting help on the Hive Forum.
Previously, the hh5 NCI project hosted the Python environments and software often used within suites (e.g., conda/analysis3 environments, pythonlib/um2netcdf4 utility).
Due to hh5 decommissioning, all references to hh5 must be replaced with the project storing the updated versions of the environments and software. For suites derived from the example suite above (u-cy339 ), the updated versions are stored in xp65.
Follow the steps below to ensure your suite is not using software from hh5:
1. Update netcdf_conversion task
In the suite.rc file, within the [[netcdf_conversion]] task, update the loading of pythonlib/um2netcdf4 to be using pythonlib/um2netcdf4/xp65 instead:
- module load pythonlib/um2netcdf4
+ module load pythonlib/um2netcdf4/xp65
2. Replace hh5 with xp65
To check if your ACCESS-CM2 suite relies on hh5, run the following command from your suite directory:
grep -r hh5 --exclude-dir=.svn .
Then, if you see any output from the command above, replace any hh5 occurrency with xp65.
Lines that you will likely need to replace include storage specification lines (e.g., -l storage = ...+gdata/hh5...) and modules (e.g., module use /g/data/hh5/public/modules).
Warning
If your suite loads conda/analysis3, to ensure reproducibility it is suggested to use a specific version of the environment (e.g., conda/analysis3-25.11).
For more information about conda/analysis3 Python environment, refer to the conda/analysis3 Python Environment page.
Port suites from accessdev
Warning
Some suites might not be ported this way.
If you have a suite that was running on accessdev and even after following the steps below the run submission fails, consider getting help on the Hive Forum.
accessdev was the server used for ACCESS-CM2 run submission workflow before the update to persistent sessions.
If you have a suite that was running on accessdev, you can run it using persistent sessions by carrying out the following steps:
1. Initialisation step
To set the correct SSH configuration for Cylc, some SSH keys need to be created in the ~/.ssh directory.
To create the required SSH keys, run the following command:
/g/data/hr22/bin/gadi-cylc-setup-ps -y
Tip
You only need to run this initialisation step once.
2. Set host to localhost
To enable Cylc to submit PBS jobs directly from the persistent session, the suite configuration should have its host set as localhost.
You can manually set all occurrences of host to localhost in the suite configuration files.
Alternatively, you can run the following command in the suite folder:
grep -rl --exclude-dir=.svn "host\s*=" . | xargs sed -i 's/\(host\s*=\s*\).*/\1localhost/g'
3. Add gdata/hr22 and gdata/ki32 in the PBS storage directives
As the persistent sessions workflow uses files in the hr22 and ki32 project folders on Gadi, the respective folders need to be added to the storage directive in the suite configuration files.
You can do this manually or run the following command from within the suite directory:
grep -rl --exclude-dir=.svn "\-l\s*storage\s*=" . | xargs sed -i '/\-l\s*storage\s*=\s*.*gdata\/hr22.*/! s/\(\-l\s*storage\s*=\s*.*\)/\1+gdata\/hr22/g ; /\-l\s*storage\s*=\s*.*gdata\/ki32.*/! s/\(\-l\s*storage\s*=\s*.*\)/\1+gdata\/ki32/g'
Known issues
Below are listed some ACCESS-CM2 known issues which are not going to be fixed.