Danger
This page is tailored to experienced users and collaborators developing ACCESS models.
This step is not required if you only want to run a model. If you are looking for information on how to run a model, refer to the Run a Model section.
Create Prereleases and Releases for an ACCESS Model
About
The instructions below outline how to trigger automatic prerelease and release builds of an ACCESS model by making use of the build and deployment workflows enabled by the access-nri/build-cd repository.
This allows, for example, quick testing of the development of a new feature in a specific ACCESS Model configuration.
The following instructions outline how to trigger a prerelease build of ACCESS-OM2 after modifying its MOM5 component. All other components of the official ACCESS-OM2 release will remain unchanged.
Tip
The following instructions are valid (with simple tweaks) for all ACCESS models.
Prerequisites
-
Join the required projects specific to the HPC system
For models deployed toGadi, join thevk83project by requesting membership on the respective vk83 NCI project page.For more information on joining specific NCI projects, refer to How to connect to a project.
-
Write permissions to the related model deployment repository
To request write permissions for a specific model deployment repository, please contact ACCESS-NRI.
The model deployment repository
All ACCESS models have their deployments on HPC systems controlled by an ACCESS-NRI's GitHub repository, named according to the specific model.
For example, the deployment of ACCESS-OM2 is controlled by the ACCESS-OM2 GitHub repository.
The model deployment repository also enables automatic prerelease build deployments of the model whenever commits are added to one of the repository's open Pull Requests (PR).
Every push to a PR triggers an isolated prerelease build deployment for the PR (every PR can be seen as a separate development configuration for the model).
When a PR is merged, the related prereleases are deleted and an official release build is created.
Although the structure of different model deployment repositories can slightly differ, their top-level will always contain a:
The spack.yaml file
The spack.yaml file defines the Spack environment that constrains the versions and features (variants) of all dependencies required to build a given ACCESS model. At build time, it is concretized into a single set of dependencies, creating a spack.lock file.
For more information on the spack.yaml file, refer to ACCESS-NRI's DevDocs.
The config directory
The config directory contains a single versions.json file. This file allows customisation of both the version of access-nri/spack used to deploy the model and the version of access-nri/spack-packages that will source the recipes for the Spack packages.
Trigger model prerelease and release build deployments
As mentioned above, prerelease build deployments are triggered by a push of one or more commits within a model deployment repository's open PR. When the PR is merged, a release build deployment is created.
The following sequence of tasks are needed to trigger a prerelease and release build deployment for a model new feature:
1. Clone the repository and create a feature branch
The first step is to clone the model deployment repository and create a feature branch, on which new features will be developed.
To clone the ACCESS-OM2 deployment repository and create a feature branch named update_mom5_dev_build run:
git clone https://github.com/ACCESS-NRI/ACCESS-OM2.git
cd ACCESS-OM2
git checkout -b update_mom5_dev_build
2. Apply the modifications and commit the changes
Modifications can then be made to the spack.yaml or config/versions.json files as needed (e.g., update packages versions, add or change variants, etc.).
After making the modifications, commit the changes to the newly-created feature branch and push them to the remote repository.
In this example, we will change ACCESS-OM2's MOM5 component by replacing it with the version from MOM5 development branch.
To achieve this, the following steps will be carried out:
-
Retrieve the Git hash (LONG_HASH) for the
developmenthead commit.Warning
Currently, only Git tags and commit hashes are supported for specifying component versions.
To use a Git branch, its corresponding commit hash should be retrieved and used instead. -
Update the version of the
mom5package in thespack.yamlfile with the new version (i.e.,@git.LONG_HASH). -
It is also recommended to update the overall ACCESS-OM2 version.
This is particularly important before merging a PR as it will determine the version tag for the model new release. The format isCALVER_YEAR.CALVER_MONTH.MINOR.
In this example, the overall version will be updated togit.2024.03.1.
After completing the modifications above, the output of the command
git diff
specs listTo stage and commit the changes, run:
git commit -am "Updated mom5 to development version."
Finally, push the changes to the remote repository by executing:
git push --set-upstream origin update_mom5_dev_build
3. Open a PR
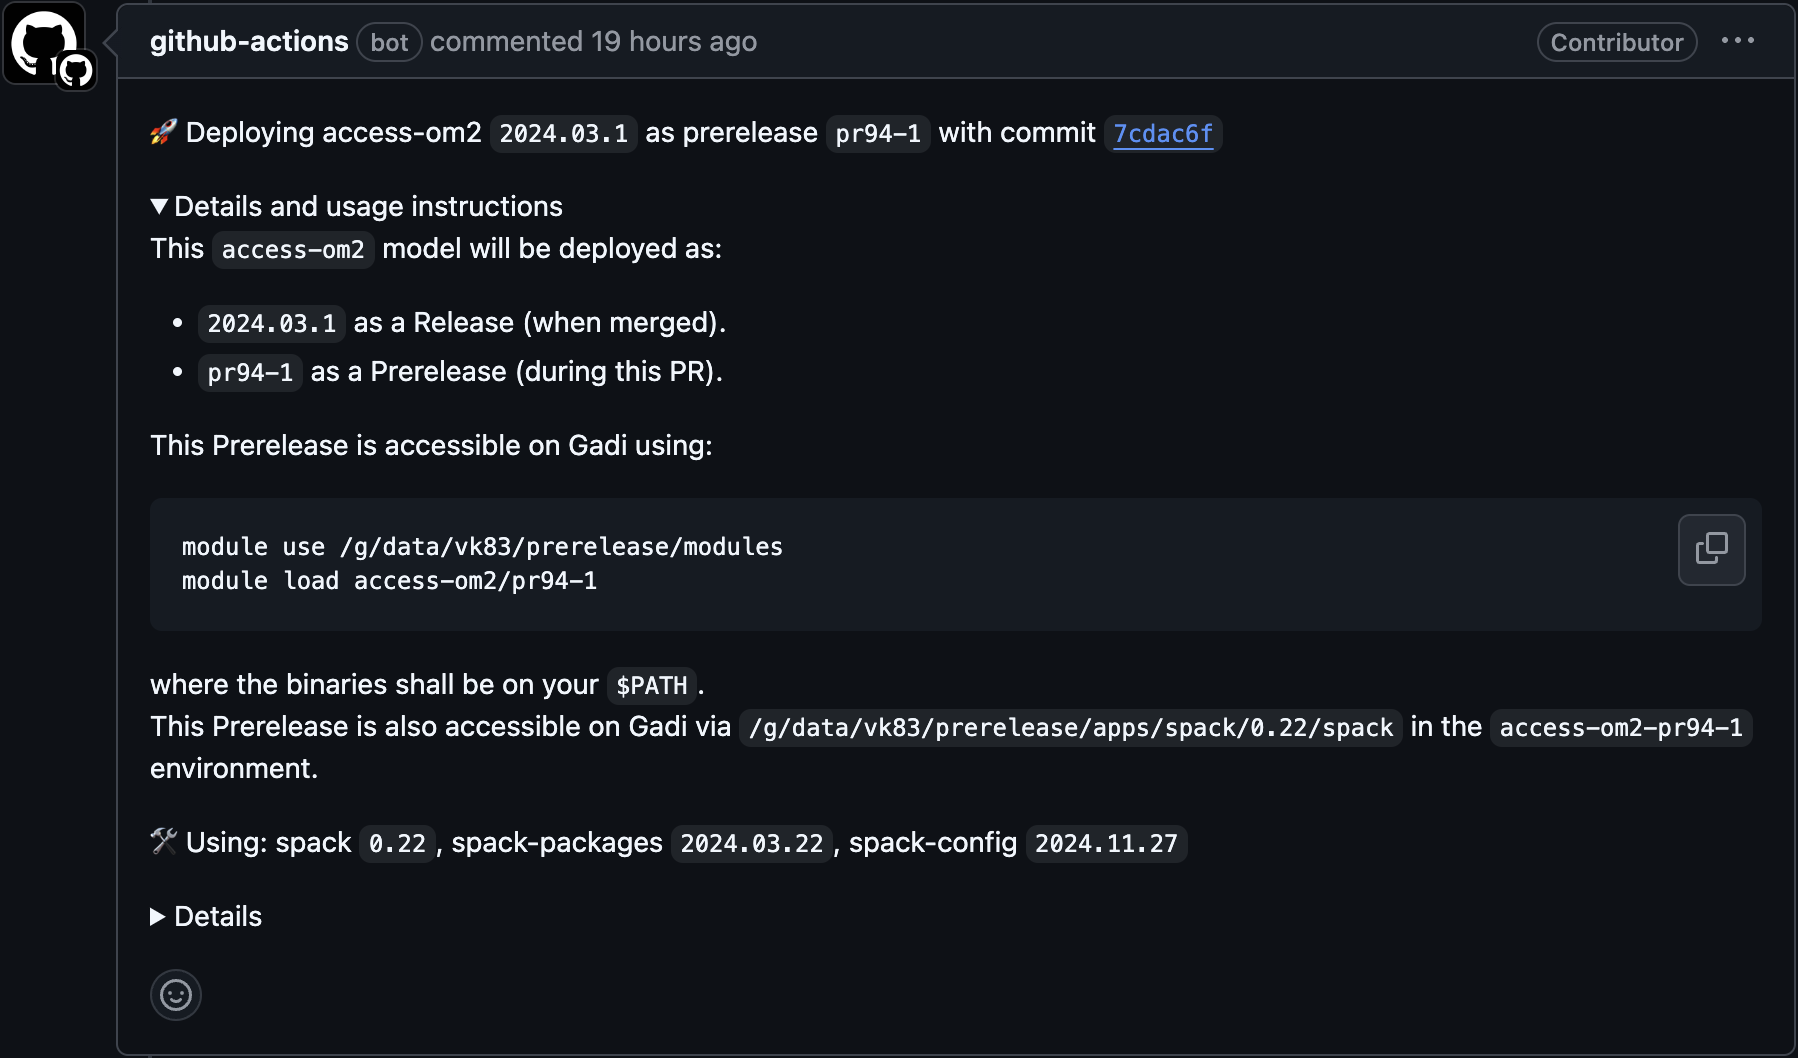
To trigger a prerelease build, open a PR with the main branch of the model deployment repository as the base. This will start a model build attempt by GitHub's CI/CD infrastructure. As a result, a comment is added by github-actions[bot] saying that the build is deploying.
Once the deployment is successful, you will be able to access the prerelease on the listed HPC systems by following the instructions specified in the comment's Details and usage instructions.
There are three main statuses for a deployment that can be identified by looking at the GitHub Environment dialog box in the related PR:
-
Successful
A successful deployment is identified by a green (Active deployment) or white (Inactive deployment) icon, with the Active one being the most recent deployment within the repository.
If a deployment is successful, it can be accessed on HPC systems.


-
In Progress
The deployment is still ongoing. It will soon become successful or fail.

-
Failed
The deployment failed and the CI/CD log can be viewed by clicking on Show environments in the GitHub Environment dialog box.

If we open a PR to the ACCESS-OM2 deployment repository with our update_mom5_dev_build branch as the base, we will get a comment. Once deployed, the prerelease build can be accessed through the module access-om2/pr94-1:
Tip
If further changes are required within the same PR, additional commits can be pushed onto the feature branch to create more prerelease builds. This does not remove earlier prerelease builds, allowing concurrent testing of multiple different builds.
For example, adding an additional commit to the update_mom5_dev_build branch (while its PR is open) will trigger another prerelease build and allow the use of the module access-om2/pr94-2, once deployed.
4. Merge or close the PR
If the PR gets merged, an official ACCESS-NRI release build of the given model will be created, along with an associated GitHub Release.
Warning
When a PR is closed (this includes merged PRs), regardless if it was merged or not, all the related prereleases deployments get removed.
You can retrieve a single prerelease build by creating a Spack environment using the spack.yaml/spack.lock artifact related to the specific commit.
Draft vs non-draft PR
The prerelease build workflow used to trigger model prereleases differs depending on whether the open PR is a draft or a regular PR. The differences are summarized in the table below:
| Type | Used for | CI Checks |
|---|---|---|
| Regular PR | Changes to be incorporated into the default branch as a Release. | The full range of CI checks, including conformance to our restricted spack.yaml syntax. |
| Draft PR | Changes that are not intended for a Release, but instead being used for testing. | Minimal CI Checks, only validating that the model name and version is formatted correctly. |
Comment Commands
Another way to trigger the CI/CD pipeline is by commenting on a model deployment repository's open PR with a specific Comment Command.
This will trigger the CI/CD pipeline and perform certain actions, depending on the specific Comment Command.
Info
All Comment Commands must be at the beginning of the comment, without any leading spaces.
The following Comment Commands are available in all model deployment repositories:
!bump
Info
Requires the commenter to have write permissions within the repository.
Usage
!bump [major|minor]
Description
Convenience function that automatically bumps the overall model version in the spack.yaml file and commits the result to the PR branch.
The overall model version is formatted as YEAR.MONTH.MINOR.
!bump major bumps the model version to the next major version, formatted as YEAR.MONTH.0, where YEAR and MONTH correspond to the current year and month when the comment is issued.
!bump minor bumps the model version to the next minor version, formatted as YEAR.MONTH.(MINOR+1). Here YEAR, MONTH and MINOR are the same as the previous version.
Example
For example, if in Jan 2025 we commented with !bump major on an open PR that has its overall model version set to git.2024.06.2, the overall model version would be bumped to git.2025.01.0.
If, however, we commented the PR with !bump minor, the overall model version would be bumped to git.2024.06.3 regardless of the comment date.
!redeploy
Info
Requires the commenter to have write permissions within the repository.
Usage
!redeploy
Description
Convenience function that triggers a new independent deployment of the HEAD of the model deployment repository PR branch.
This is used to trigger a new deployment when a transient error with the prerelease build process occurs (e.g., Gadi is down).
Backporting Bugfixes
The default branch of a model deployment repository usually reflects the most up-to-date changes to the model. Hence, it is always at the same level or ahead of the model's latest major release.
However, it is also essential to provide a way to apply bug fixes to earlier major versions of the model. This is where dedicated backport/YEAR.MONTH branches come into play, allowing bug fixes to be incorporated into previous versions of the model.
For example, let's say there is a bug fix that needs to be incorporated to the ACCESS-OM2 2023.11.23 release.
To do so, a developer should:
- Create a
backport/2023.11branch (if it doesn't already exist) from the2023.11.23tag:git checkout -b backport/2023.11 2023.11.23git checkout -b backport/2023.11 2023.11.23 Switched to a new branch 'backport/2023.11' - Apply the bug fixes, commit and push the changes:
git commit -am "Bug fix."
git push --set-upstream origin backport/2023.11
git commit -am "Bug fix." [backport/2023.11 cac60f0] Bug fix. 1 file changed, 2 insertions(+), 1 deletions(-) git push --set-upstream origin backport/2023.11 Enumerating objects: 5, done. Counting objects: 100% (5/5), done. Delta compression using up to 8 threads Compressing objects: 100% (3/3), done. Writing objects: 100% (3/3), 565 bytes | 565.00 KiB/s, done. Total 3 (delta 2), reused 0 (delta 0), pack-reused 0 remote: Resolving deltas: 100% (2/2), completed with 2 local objects. remote: remote: Create a pull request for 'backport/2023.11' on GitHub by visiting: remote: https://github.com/ACCESS-NRI/ACCESS-OM2/pull/new/backport/2023.11 remote: To https://github.com/ACCESS-NRI/ACCESS-OM2.git * [new branch] backport/2023.11 -> backport/2023.11 branch 'backport/2023.11' set up to track 'origin/backport/2023.11'. - Open a PR from the
backport/2023.11branch with the fixes.
When the PR is merged, a release tagged as2023.11.24will be created.